It’s very easy to start new apps with docker run nowadays. But how can you restart automatically your containers after a system reboot? Is it necessary to start Docker with root privileges? Do you really need to expose “/var/run/docker.sock” as root to update your images?
Podman is a Docker alternative developed by Red Hat. With Podman, you can run containers and update images as unprivileged user, and restart them on reboot like others systemd units. Applications that need multiple containers (e.g. server + database) can be organized in pods, and configured through quadlet files, and this makes them really easy to maintain.
In this guide, I want to talk about how I set up a simple CCTV surveillance system for a friend using Podman. For clarity, let’s consider the following:
- We will install two applications, Uptime Kuma (1 container) and Shinobi (2 containers).
- The user that will start our containers is “jack”, with UID 1000.
- All commands should be run on a terminal as “jack”. If they require elevated privileges, they are prepended with
sudo. - The IP address of the server in the LAN is 192.168.1.10.
- I am using Arch Linux, so you need to change
yaywith your package manager, e.g.aptfor Debian-based distributions.
The final setup will look like this:

Installing Podman
With this command we will install podman, all the necessary dependencies, and aardvark-dns, which allows containers and pods to talk to each other using their names, rather than IP addresses only.
yay -Sy podman aardvark-dnsNow, we need to assign many “sub IDs” to our jack user, so they can be assigned to users inside our containers.
sudo usermod --add-subuids 100000-170000 --add-subgids 100000-170000 jackThe files /etc/subuid and /etc/subgid should look like this:
jack:100000:70000Since we want our containers to start automatically in case of a reboot, the user must always have an active session.
sudo loginctl enable-linger jackNow we need to create two folders: one where to store quadlets, and one where to store files saved from containers.
# you must use this location for quadlets
mkdir -p $HOME/.config/containers/systemd

# you can choose another location for storage
mkdir -p $HOME/containers/storage
Then, we make podman aware of our “/etc/subuid” changes and we tell it to check daily for new image versions:
podman system migrate
systemctl --user enable --now podman-auto-update
Creating an internal network with DNS resolution
Since we want pods to talk to each other using their names instead of their IP addresses, we need to create a network with DNS resolution, as podman doesn’t do that by default. The network name in this case will be “jack”.
Create a quadlet file for the network:
nano $HOME/.config/containers/systemd/jack.networkCopy the following configuration:
[Unit]
Description=Jack network
After=podman-user-wait-network-online.service

[Network]
NetworkName=jack
Subnet=10.90.0.0/24
Gateway=10.90.0.1
DNS=1.1.1.1

[Install]
WantedBy=default.target
Container and pod names will be resolved by aardvark-dns at 10.90.0.1, while external domains will be resolved by Cloudflare.
Containers can also reach services listening on the host’s 0.0.0.0 by using “host.containers.internal” as hostname:
podman run --network jack quay.io/curl/curl curl host.containers.internal:8080Now, we can apply our changes and start the network:
systemctl --user daemon-reload
systemctl --user start jack-network
Notice how I used “jack-network”, as podman turns our “jack.network” quadlet into a “jack-network.service” systemd unit.
With podman network ls we can see that we now have two active networks:
NETWORK ID    NAME        DRIVER
3f5d6079b921  jack        bridge
2f259bab93aa  podman      bridge
Configuring a single-container application
Before digging into multi-container applications, let’s test our system with a simple application consisting of a single container.
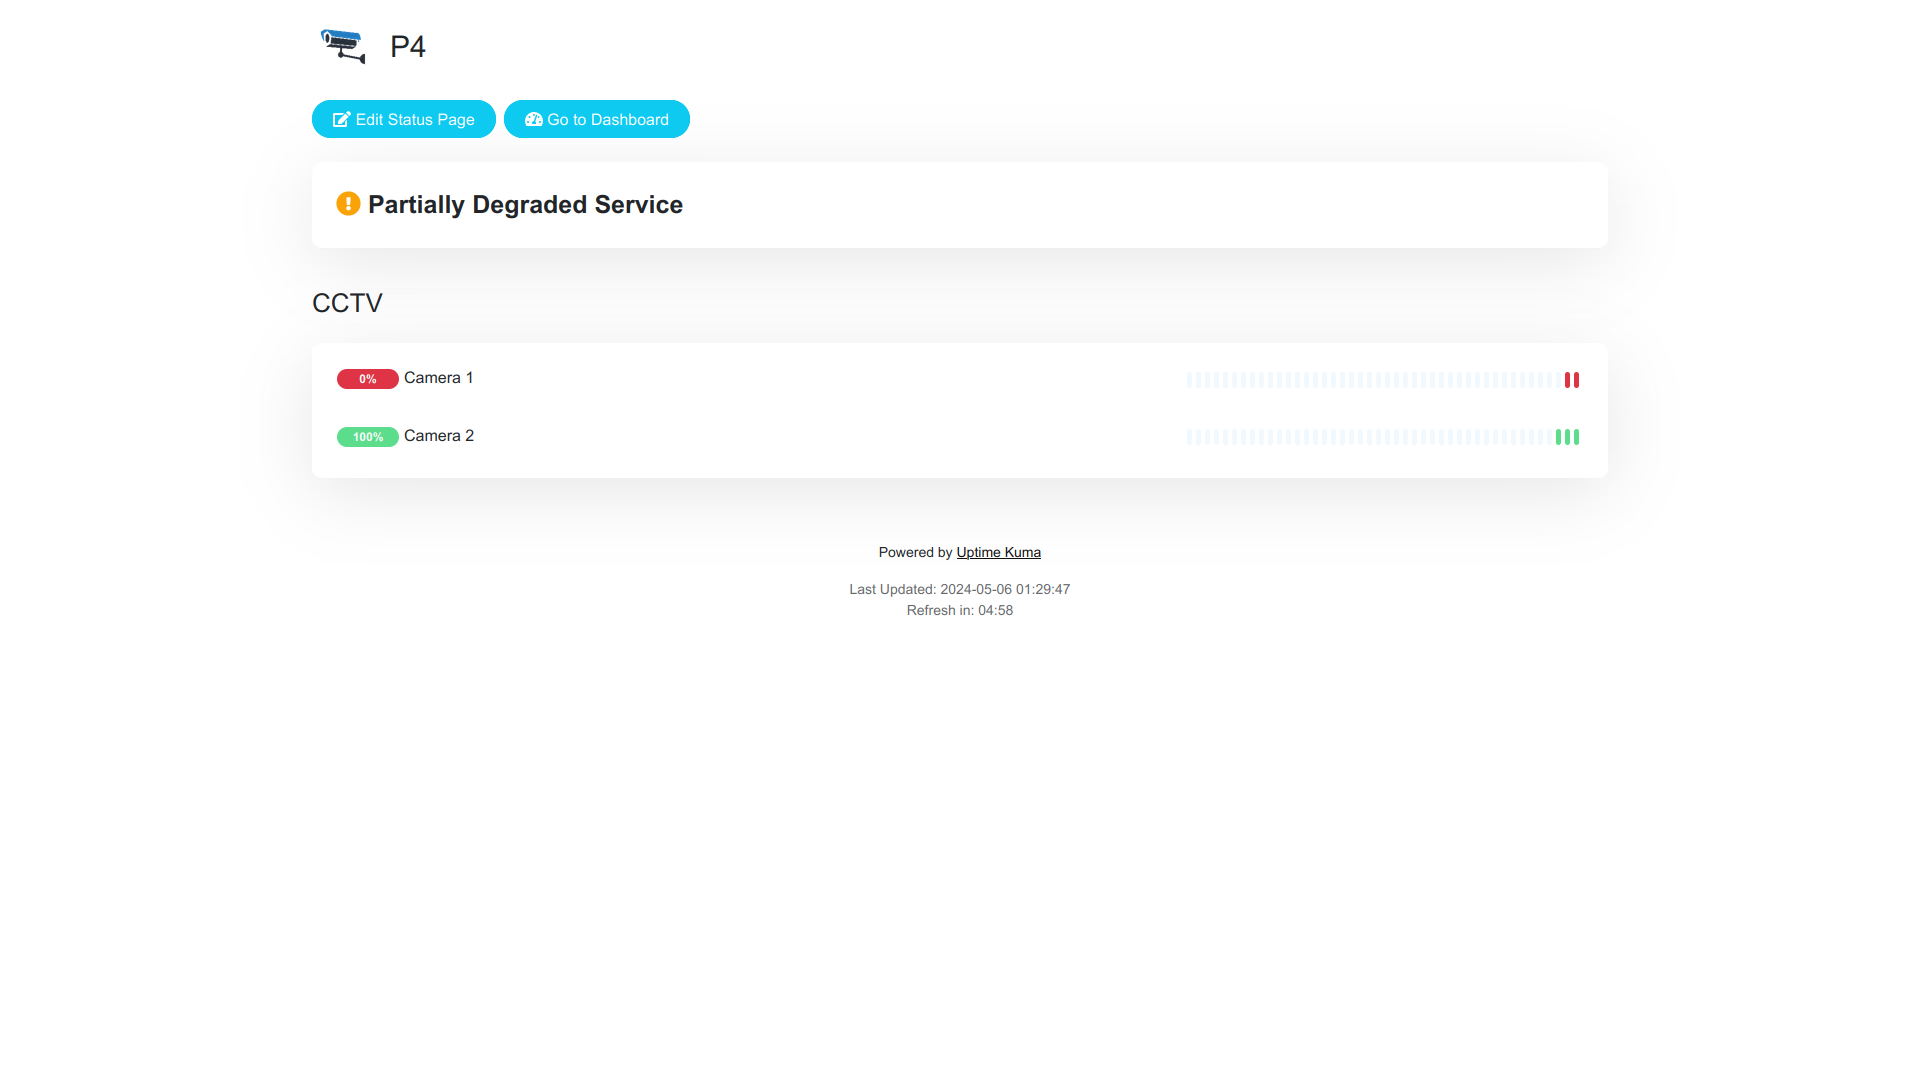
Uptime Kuma can be used to create all kind of monitors: check if cameras are online, monitor when our DDNS IP changes, and so on.
Server container
Monitors and configurations will be saved in a SQLite database, so we need a new folder for persistent storage.
mkdir -p $HOME/containers/storage/uptime-kumaThen, we need a quadlet to define the container.
nano $HOME/.config/containers/systemd/uptime-kuma.containerCopy inside the following content:
[Unit]
Description=Uptime-Kuma server

[Container]
ContainerName=uptime-kuma
Image=docker.io/louislam/uptime-kuma:1
AutoUpdate=registry

HealthCmd=curl http://127.0.0.1:3001
UserNS=keep-id:uid=1000,gid=1000

Network=jack.network
HostName=uptime-kuma
PublishPort=9000:3001

Volume=%h/containers/storage/uptime-kuma:/app/data

[Service]
Restart=always
TimeoutStartSec=300

[Install]
WantedBy=default.target
A brief explanation of what we just wrote:
- Under the
[Unit]section, we can add systemd directives, such asRequires=,After=orDescription= - Under
[Service], we specify that the container should be restarted in case it crashes - Under
[Install], we specify that the container should be started in case of a system reboot - Under
[Container], we have many options:Image=is the archive with all the application source files or binaries.AutoUpdate=if a new version of the image is available, the container is restarted to download and use the new version.HealthCmd=a periodic command that exits successfully if everything is alright, in this case, if the Web UI is reachable.UserNS=the application inside the container is launched by user 1000 (jack), instead of 0 (root).Network=the container is connected to our new network to take advantage of container DNS resolutionHostName=the host name of the container within the network.PublishPort=the application listens on the container port 3001, but it’s accessible on the host port 9000 within the LAN.Volume=the container writes to “/app/data”, which is a mount point for a folder in the host file system. “%h” is resolved to “/home/jack” by systemd.
Some options could be customized differently:
HealthCmd=alone will just notify you that a container is unhealthy. There are futher configurations to tweak when and how often these health checks should run, and if an unhealthy container should be killed and restarted.UserNS=may be incompatible with some containers that expect to run as root and then switch user, e.g. LinuxServer containers.PublishPort=localhost:9000:3001would make the application inaccessible from LAN devices, but reachable just from the server’s localhost. OmittingPublishPort=would make the service unreachable from both the host or LAN devices.
Now that we defined our container, let’s start it:
systemctl --user daemon-reload
systemctl --user start uptime-kuma
After a minutes, you should be able to access the web interface at http://192.168.1.10:9000/.
Congrats, you are now running a container without root privileges!
Configuring a multi-container application
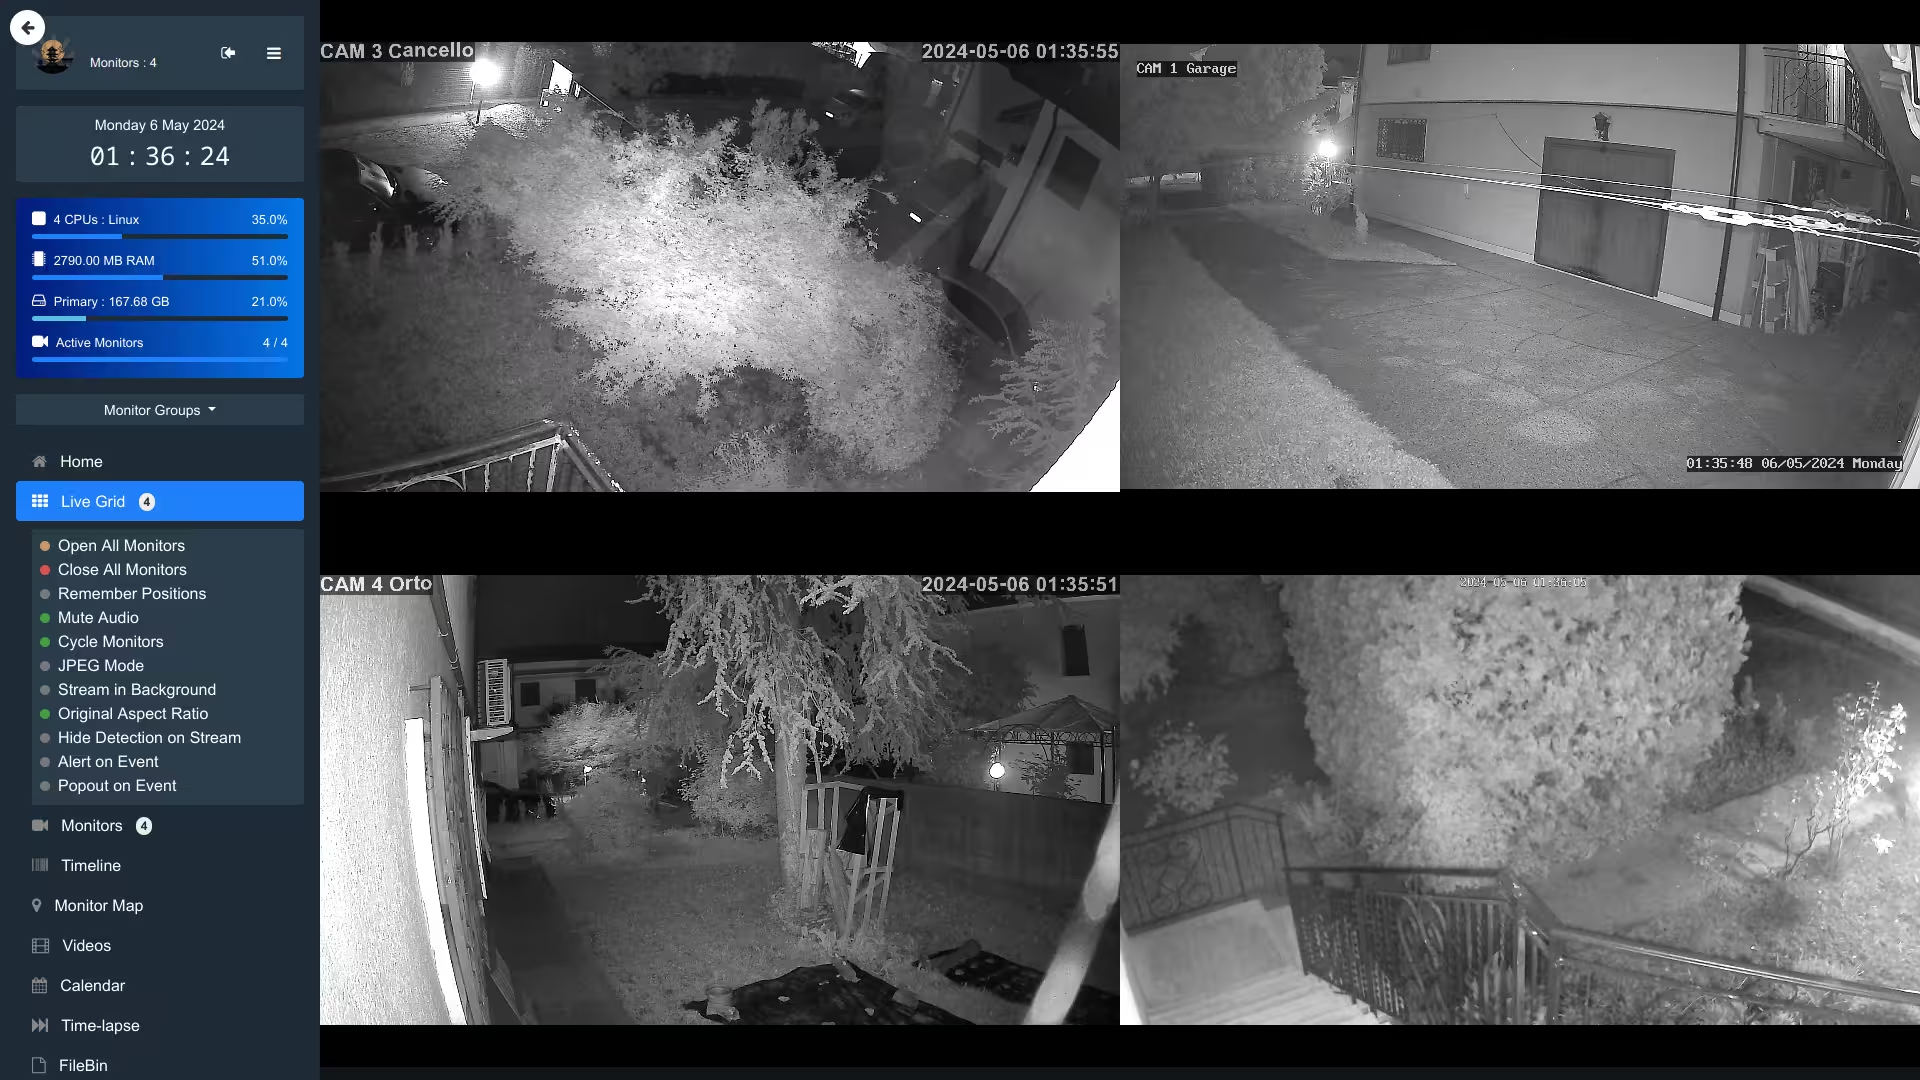
Shinobi is an open-source network video recorder (NVR). Other than the official server container, we need one for the database.
The setup procedure is similar to single-container applications, but ideally we wand to:
- group our containers in a pod, to start both containers
- start the server container only after the database container is ready
First, let’s create some folders for persistent storage:
mkdir -p $HOME/containers/storage/shinobi/mariadb
mkdir -p $HOME/containers/storage/shinobi/server
mkdir -p $HOME/containers/storage/shinobi/server/autoload
mkdir -p $HOME/containers/storage/shinobi/server/plugins
Among these folders, “/shinobi/mariadb/” will be used for the database, while “/shinobi/server/” for the server.
Application pod
Let’s configure the quadlet for the pod (note the .pod extension):
nano $HOME/.config/containers/systemd/shinobi.podCopy inside:
[Pod]
Network=jack.network
PodName=shinobi
PublishPort=9001:8080
A first difference compared to Uptime Kuma is that Network= and PublishPort= must be defined in the pod quadlet, not in container quadlets. PodName= acts as HostName=, so other pods can reach our service at “shinobi:8080”.
Since containers share the same loopback interface (localhost), you cannot have two containers that listen on the same port within the same pod (e.g. two MariaDB databases).
Database container
By default, the MariaDB container is reachable from all containers in the network, but we want to only make it reachable from the Shinobi server. We need to create a configuration file:
nano $HOME/containers/storage/shinobi/mariadb/jack.cnfAnd copy inside:
[mysqld]
bind-address=127.0.0.1
Now, let’s configure the database quadlet:
nano $HOME/.config/containers/systemd/shinobi-mariadb.containerCopy inside:
[Unit]
Description=Shinobi database

[Container]
Pod=shinobi.pod
ContainerName=shinobi-mariadb
Image=docker.io/library/mariadb:latest
AutoUpdate=registry

HealthCmd=healthcheck.sh --su-mysql --connect --innodb_initialized

Volume=%h/containers/storage/shinobi/mariadb:/var/lib/mysql
Volume=%h/containers/storage/shinobi/mariadb/jack.cnf:/etc/mysql/conf.d/jack.cnf

Environment=MARIADB_RANDOM_ROOT_PASSWORD=true
Environment=MARIADB_DATABASE=ccio
Environment=MARIADB_USER=shinobi
Environment=MARIADB_PASSWORD=shinobi

[Service]
Restart=on-failure
TimeoutStartSec=300

[Install]
WantedBy=default.target
We specified Pod= to make the database accessible by the server using the pod’s “localhost”.
We used Environment= to define some environment variables, but they can also be stored in a separate file referenced by EnvironmentFile=.
Server container
Now, we just need to configure the server before spinning up the whole stack.
Shinobi will complain if it cannot find its “conf.json” configuration file, so let’s create it:
nano /home/nano/containers/storage/shinobi/server/conf.jsonCopy inside the following:
{
  "port": 8080,
  "db": {
    "host": "localhost",
    "user": "shinobi",
    "password": "shinobi",
    "database": "ccio",
    "port": 3306
  }
}
Create the quadlet for the server:
nano $HOME/.config/containers/systemd/shinobi-server.containerCopy inside:
[Unit]
Description=Shinobi server
Requires=shinobi-mariadb.service
After=shinobi-mariadb.service

[Container]
Pod=shinobi.pod
ContainerName=shinobi-server
Image=registry.gitlab.com/shinobi-systems/shinobi:dev
AutoUpdate=registry

HealthCmd=curl http://127.0.0.1:8080

AddDevice=/dev/dri/card0
Volume=/etc/localtime:/etc/localtime:ro
Volume=%h/containers/storage/shinobi/server:/config
Volume=%h/containers/storage/shinobi/server/plugins:/home/Shinobi/plugins
Volume=%h/containers/storage/shinobi/server/autoload:/home/Shinobi/libs/customAutoLoad
Volume=/data/shinobi:/home/Shinobi/videos

[Service]
Restart=on-failure
TimeoutStartSec=300

[Install]
WantedBy=default.target
Let’s explain some directives:
- we used
Requires=andAfter=to tell systemd to start this container only after the database is ready. - with
AddDevice=, we enabled hardware acceleration for Raspberry Pi 4 in the container - the
roflag in the firstVolume=directive indicates that the file is mounted read-only - the last
Volume=points to an external hard drive to store 24/7 CCTV recordings
Now we can apply our changes and start both containers.
systemctl --user daemon-reload
systemctl --user start shinobi-pod
You should now be able to login on the web UI at http://192.168.1.10:9001/super with these credentials:
- user: admin@shinobi.video
- password: admin
Testing DNS resolution between containers
Now that we have a second container, we can go back to Uptime Kuma and create a monitor to check if Shinobi is online, using the address http://shinobi:8080.
You can also reach Uptime Kuma from Shinobi, by using the container shell:
podman exec -it shinobi-server bashFrom the container shell run:
curl uptime-kuma:3001
exit
Wrap up
We just configured a self-updating, self-restarting CCTV system that hopefully will require very little maintenance. The few minutes we spent preparing the system will save time in the long run when we will install new applications. Plus, we are not exposing root privileges to any systemd service or container.
To add a new application, remember to:
- understand what containers are needed (e.g. server + redis + postgres)
- create folders for persistent storage
- create environment or configuration files
- create quadlets to configure containers and pods
- reload systemd
- start the pod or container
- backup your quadlets and storage locations
These may seem a lot of steps at first, but your system will be more reliable and easier to maintain.
If you are interested in converting docker-compose.yml files to Podman quadlets, check the post about Podlet.